Cyberpunk 2077
Item Extraction
&
Posing Guide
In this guide I will show you how to get an item from the game into Blender so you can make your pose around it. This guide will NOT show you how to include it in your pose in photomode. For that you can check my Photomode Prop Setup Guide.For this guide I assume you know how to make poses and understand the basics of Wolvenkit and Blender. If you have never made poses before check my Photomode Pose Creation Guide first.If anything is unclear or you have any questions at all about pose making in general you can always shoot me a message on Discord (you will have to send a friend request first) or on any of the pages linked below that allow messaging. I am happy to help. :)
Discord: DeavenExe
What you should know/get before starting
- Download and install Red Hot Tools. You want to get the RedHotTools-#.#.#.zip and RedHotTools-#.#.#-Overlay.zip. Replace the #'s with whatever the latest number version is. Unzip and install the folders in your Cyberpunk 2077 directory.That's it. You should have everything else for pose making already.Guide Setup
This guide is split into three parts. You can click any of these to be taken to the right section immediatly
World Inspector
Wolvenkit
Blender
Last Updated: March 6th 2025
Added a tip for adding props to models with IK bones to stop the bones from becoming small in the Blender part.
World Inspector
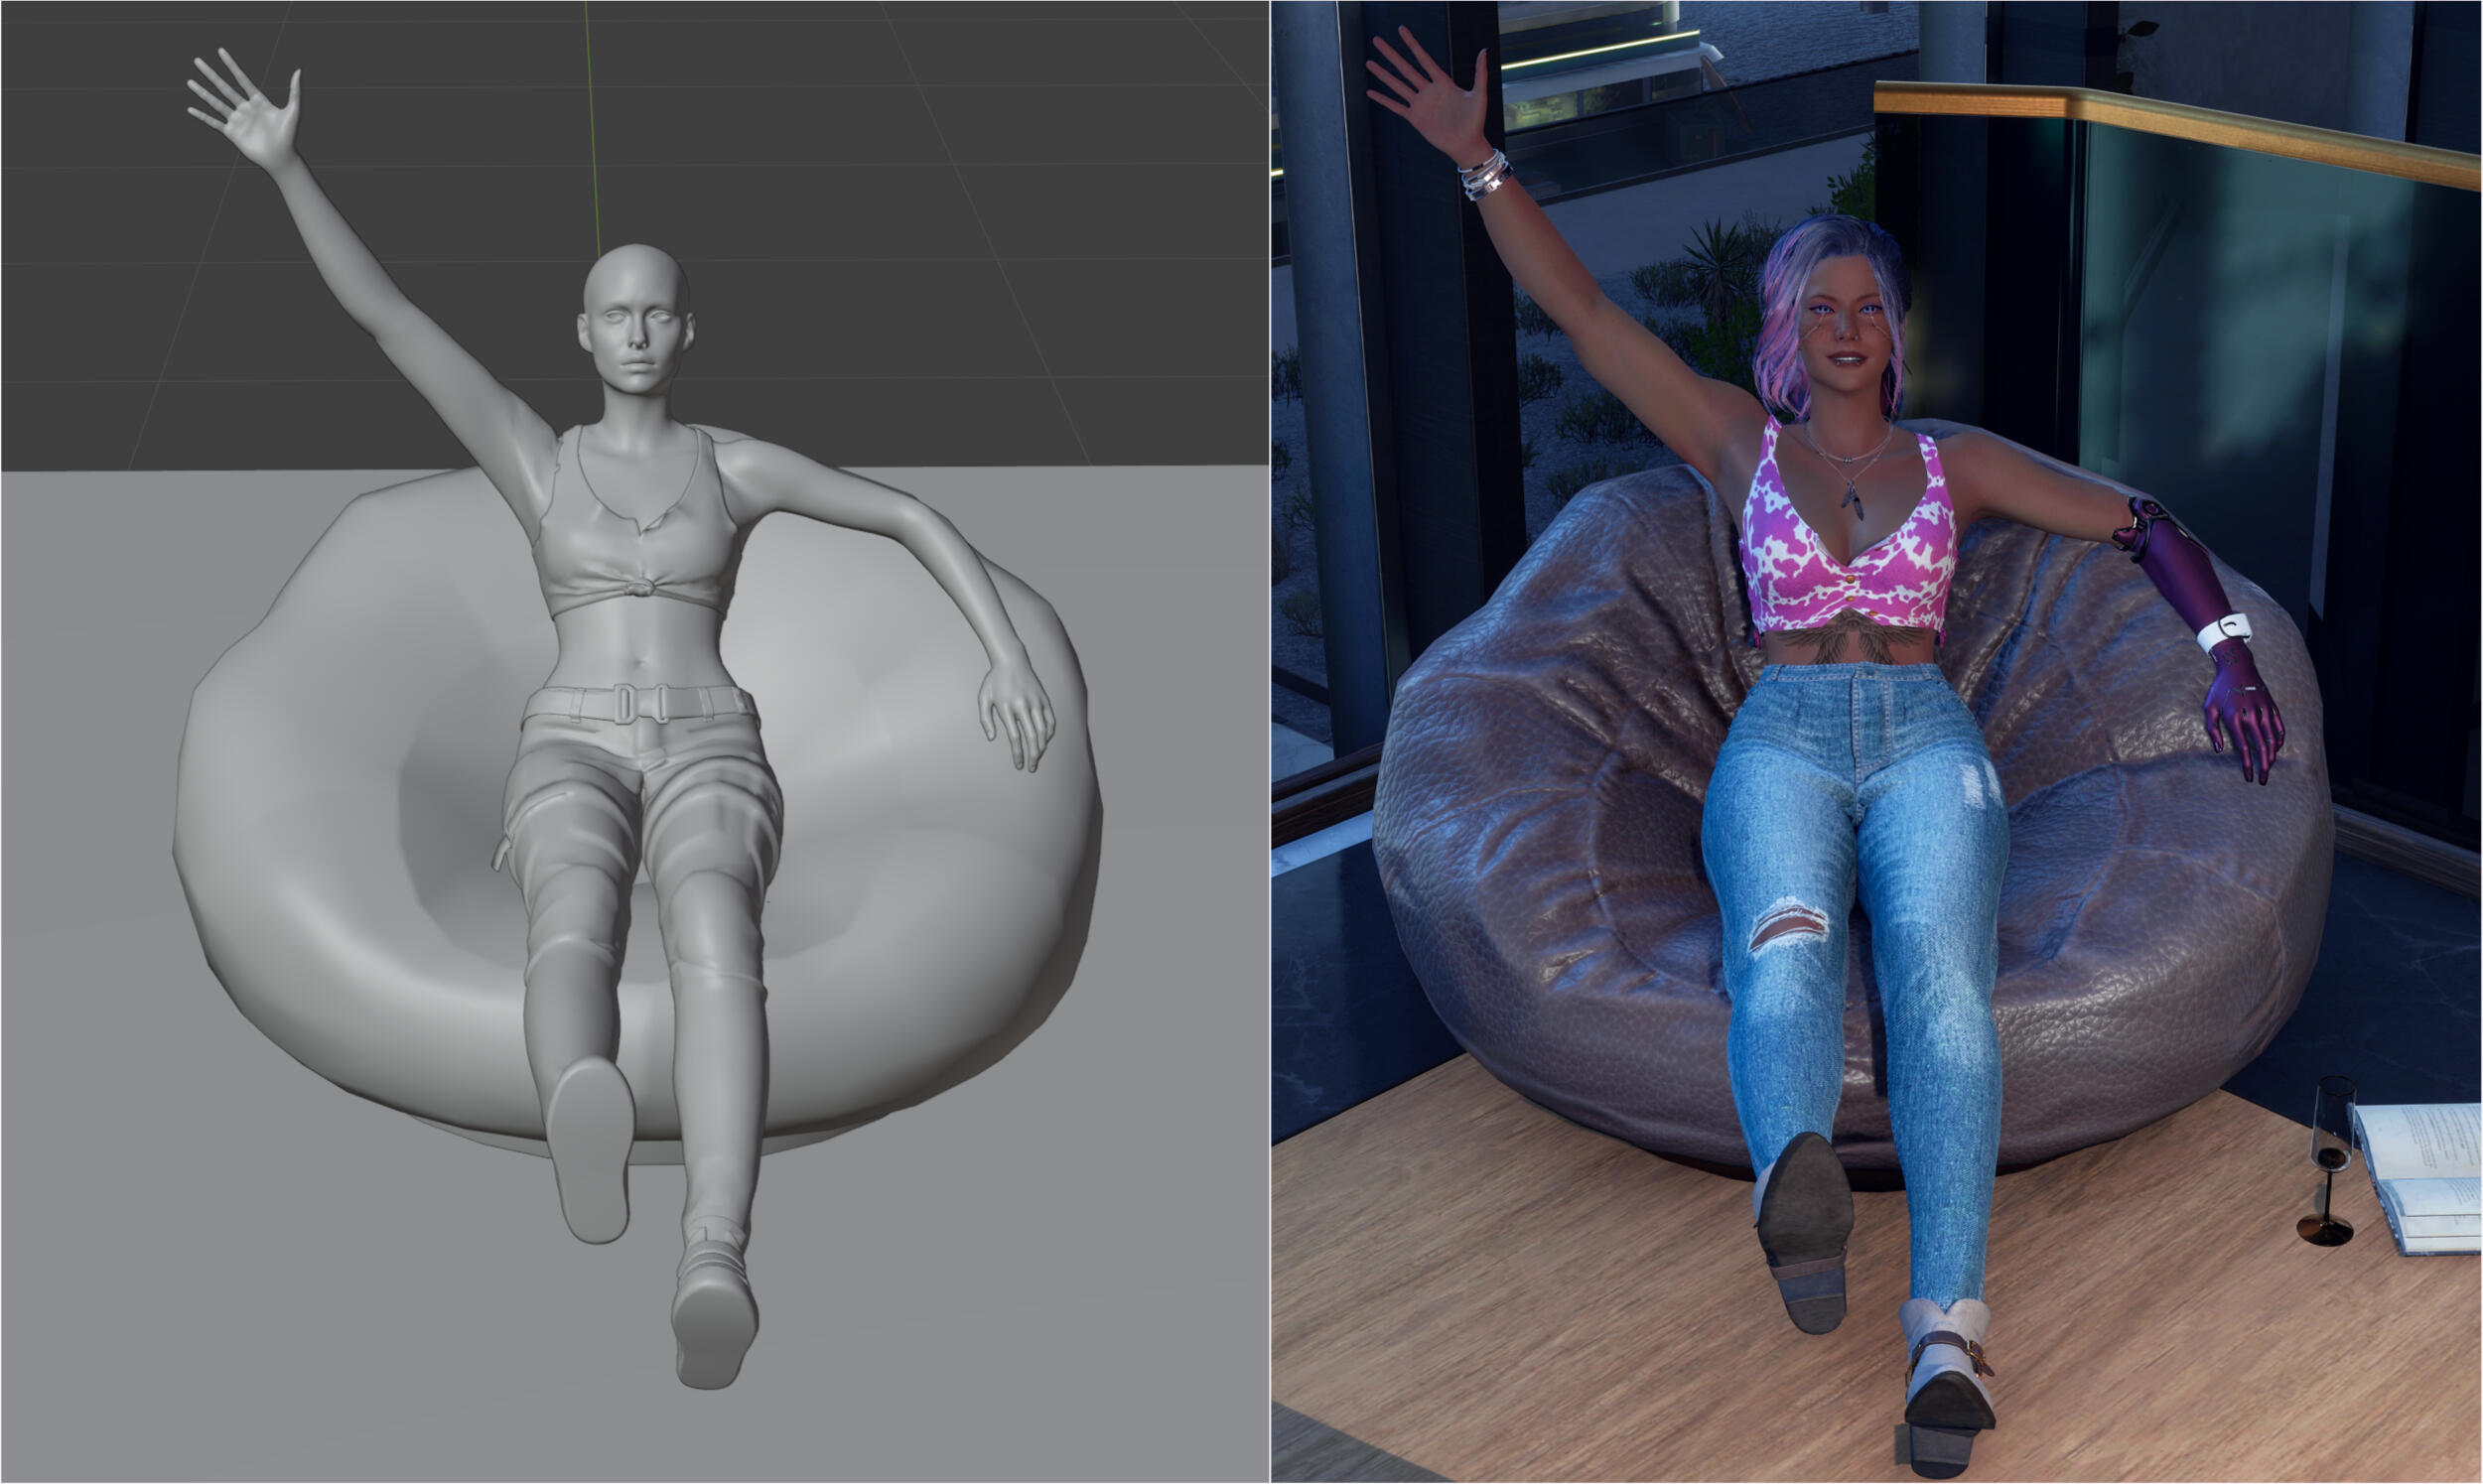
If you have installed Red Hot Tools the first thing we will do is start up Cyberpunk 2077 to get the info we need for the item we want!Go to the item you want to get and open your CET window. You may need to bind the World Inspector (which is part of Red Hot Tools) if you don't see it which you can do in your CET bar. If it's there already great! (Quick side note if you have like a ton of windows when you open CET because there are so many programs to add I can absolutely recommend the CET Window Manager Mod to create some order in the chaos.)Once you have the World Inspector open and the item you want in front of you go over to the Scan tab and press Scan world nodes. I'm going for the bean bag for this tutorial.
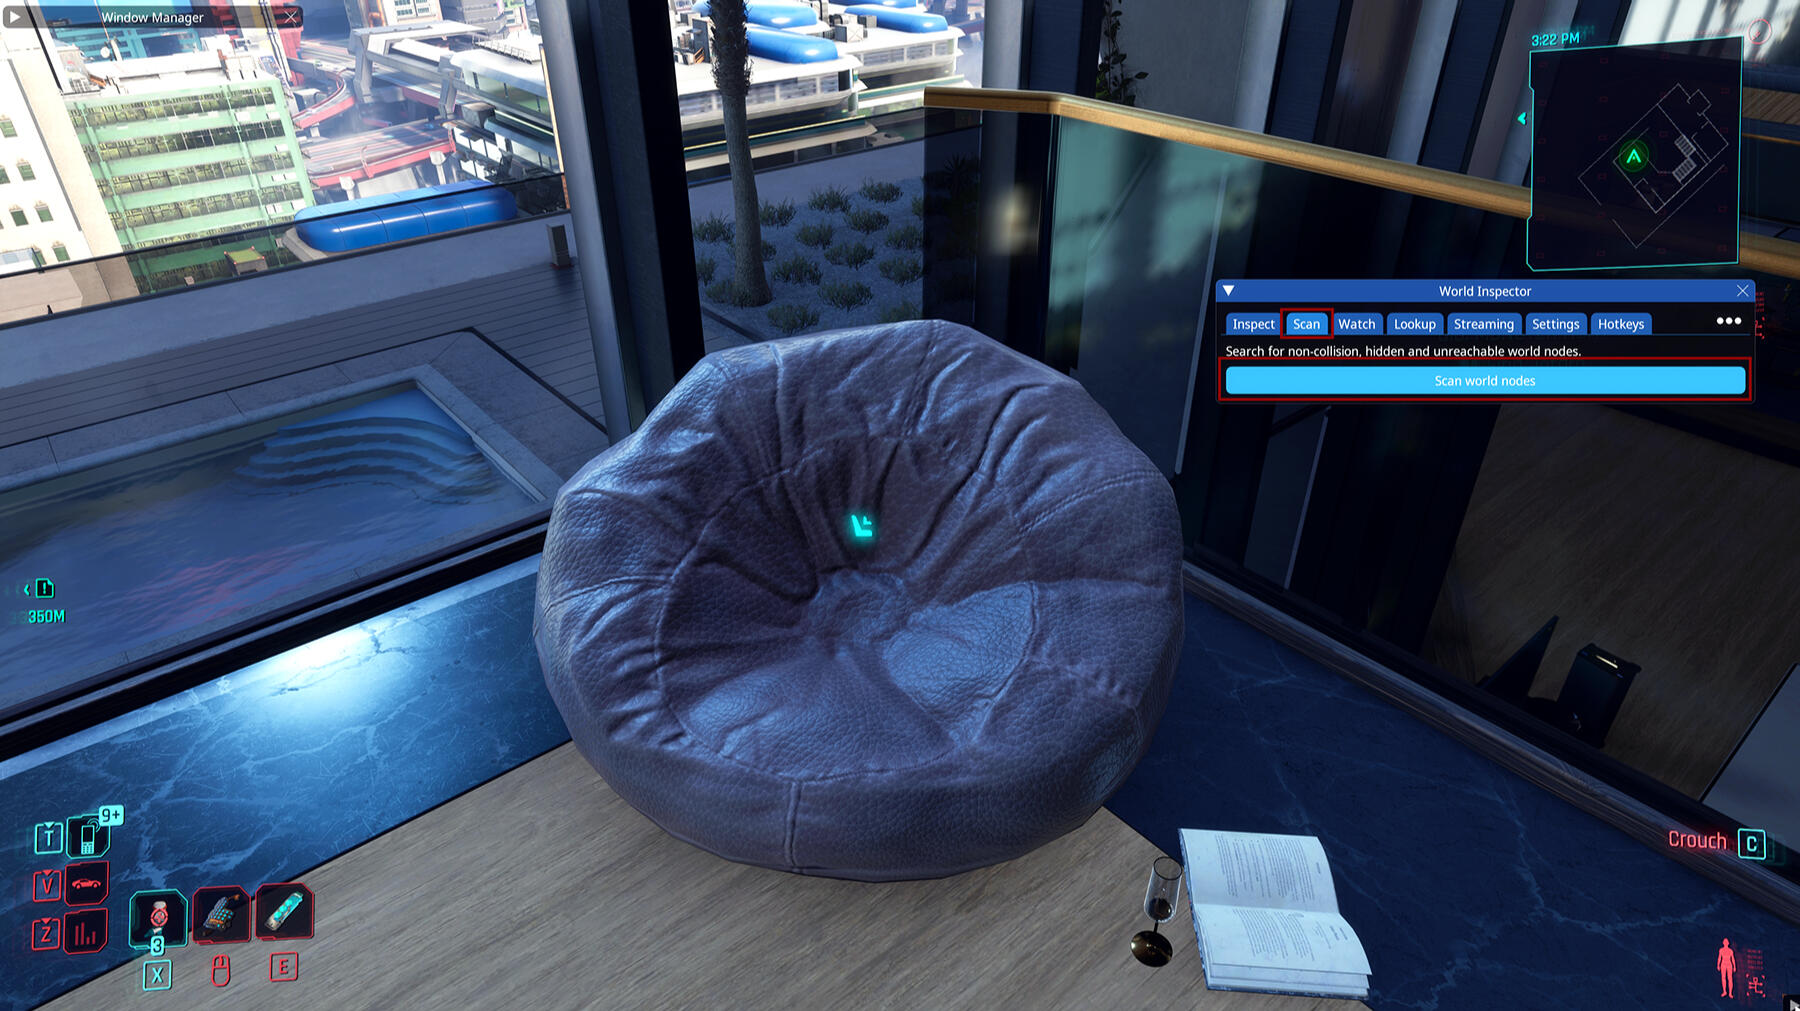
Now the Inspector will obviously do what's in the name, scan the world and everything at a certain distance from you. Mine is still on 5.0m from a previous scan but if yours is lower or higher you can easily adjust it if need be. Now we're going to find our specific item. For some items it may be very direct and easy and it will have things like seat or table in it if that is what you are pointing at but for other items it may have a name you did not consider. Luckily it is easy to figure out see the next step.
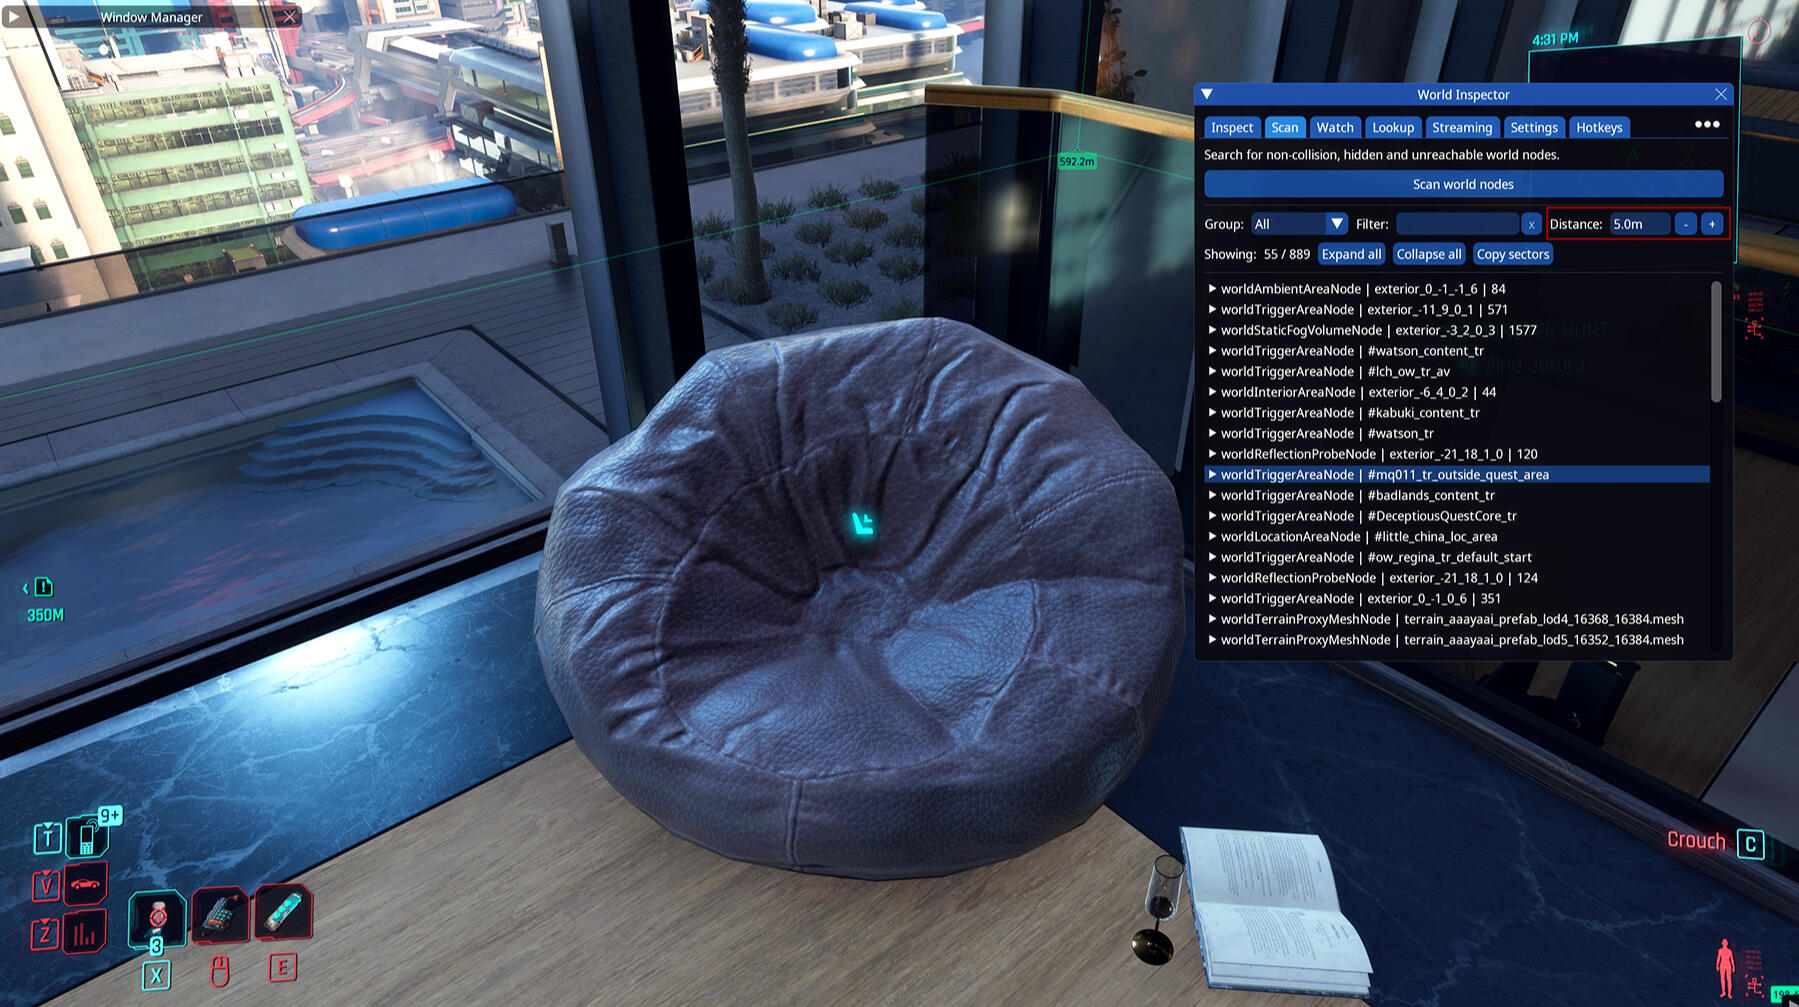
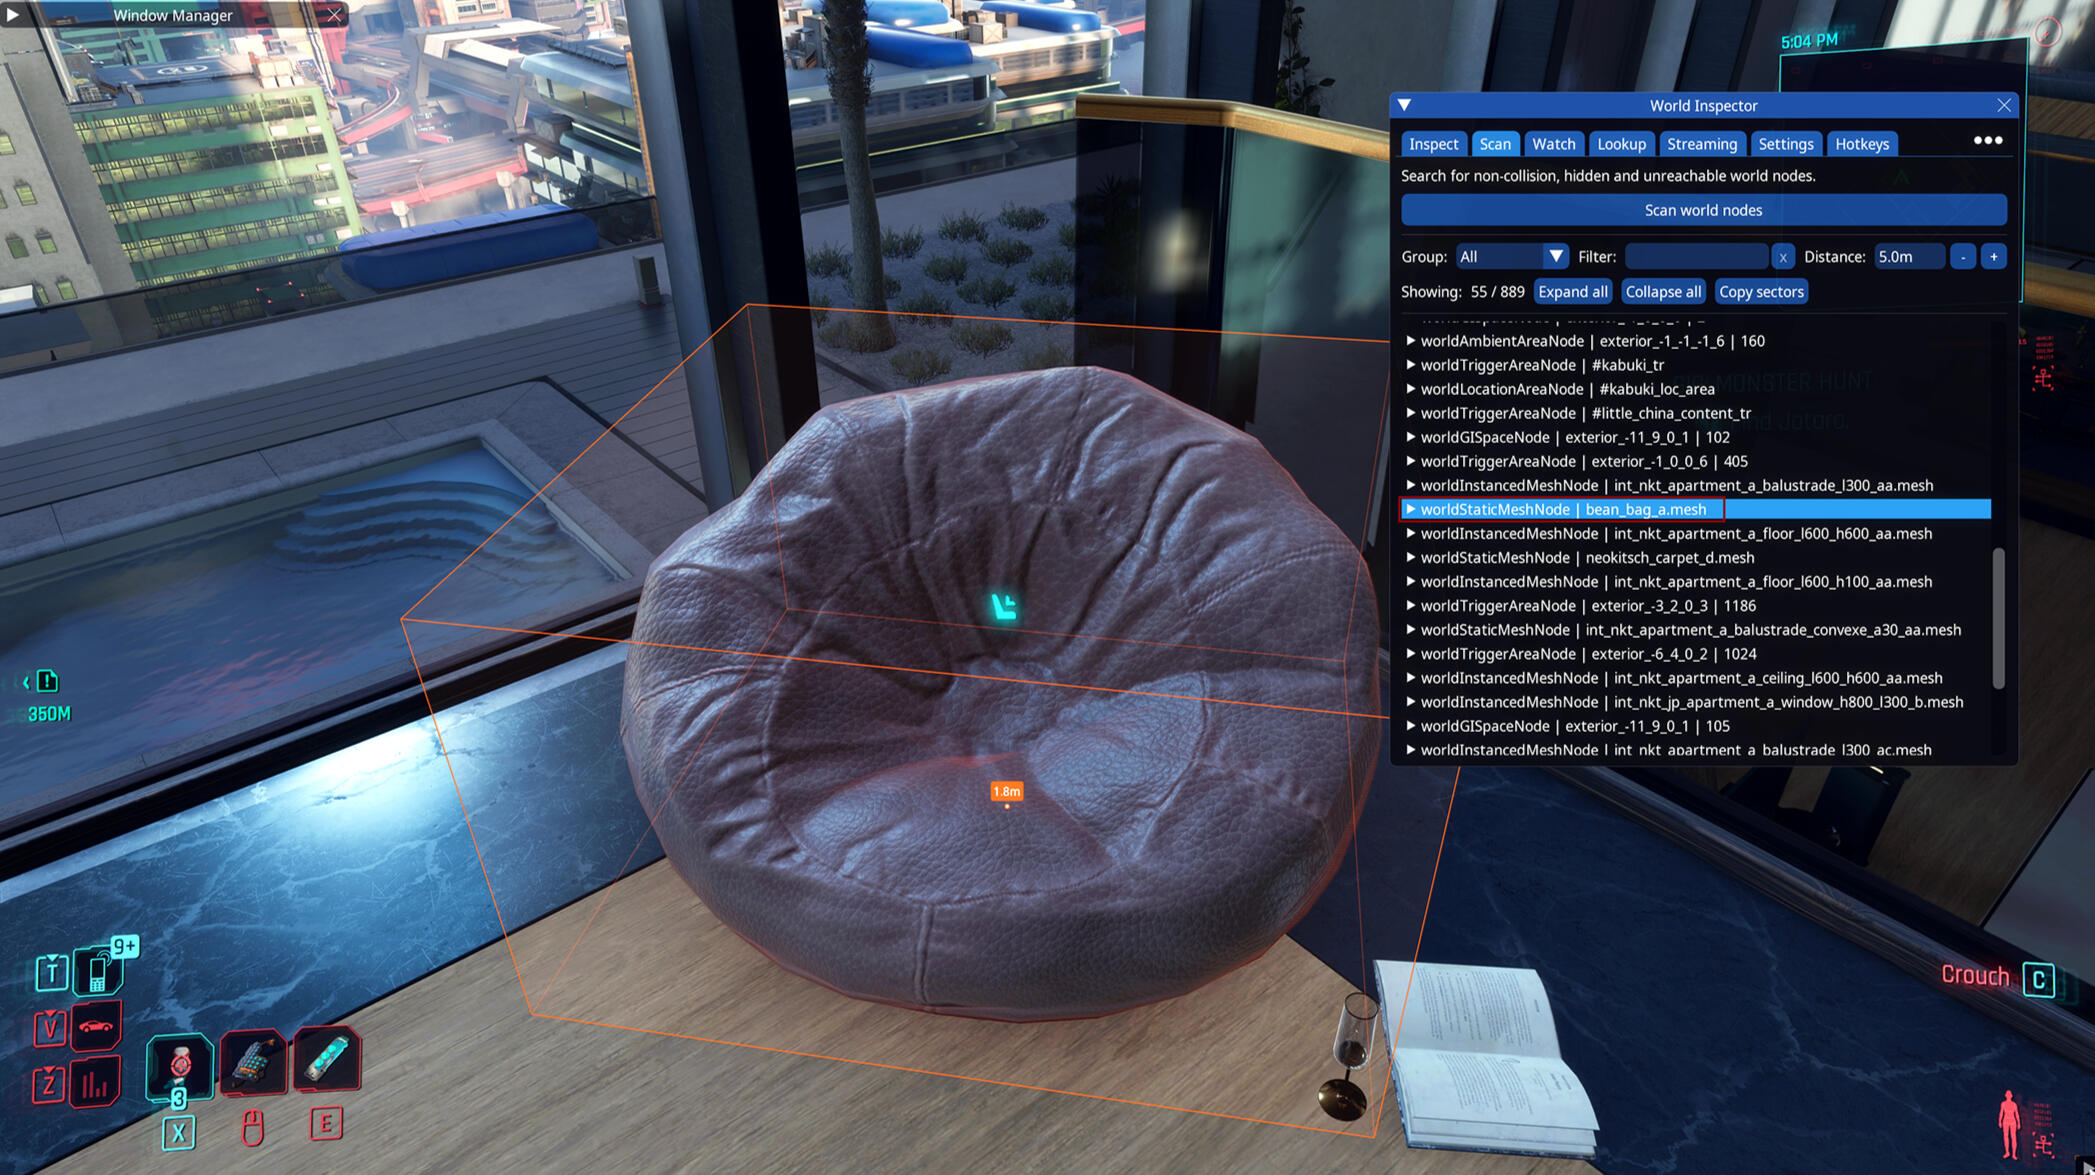
If you hover over each line you will see things beginning to light up around you. As you can see below while hovering over the bean bag it now has an orange box around it. Just by hovering over the things in the list you can easily track down any item. (I tried to make a gif for it but the game kept crashing with the screen recording on sorry everyone!)
Another quick note but if you open up the item you may have the option to make it invisible! Can be handy for pictures. Once you reload your save the item will be visible again! So no worries if you forget to undo the invisibility at some point.
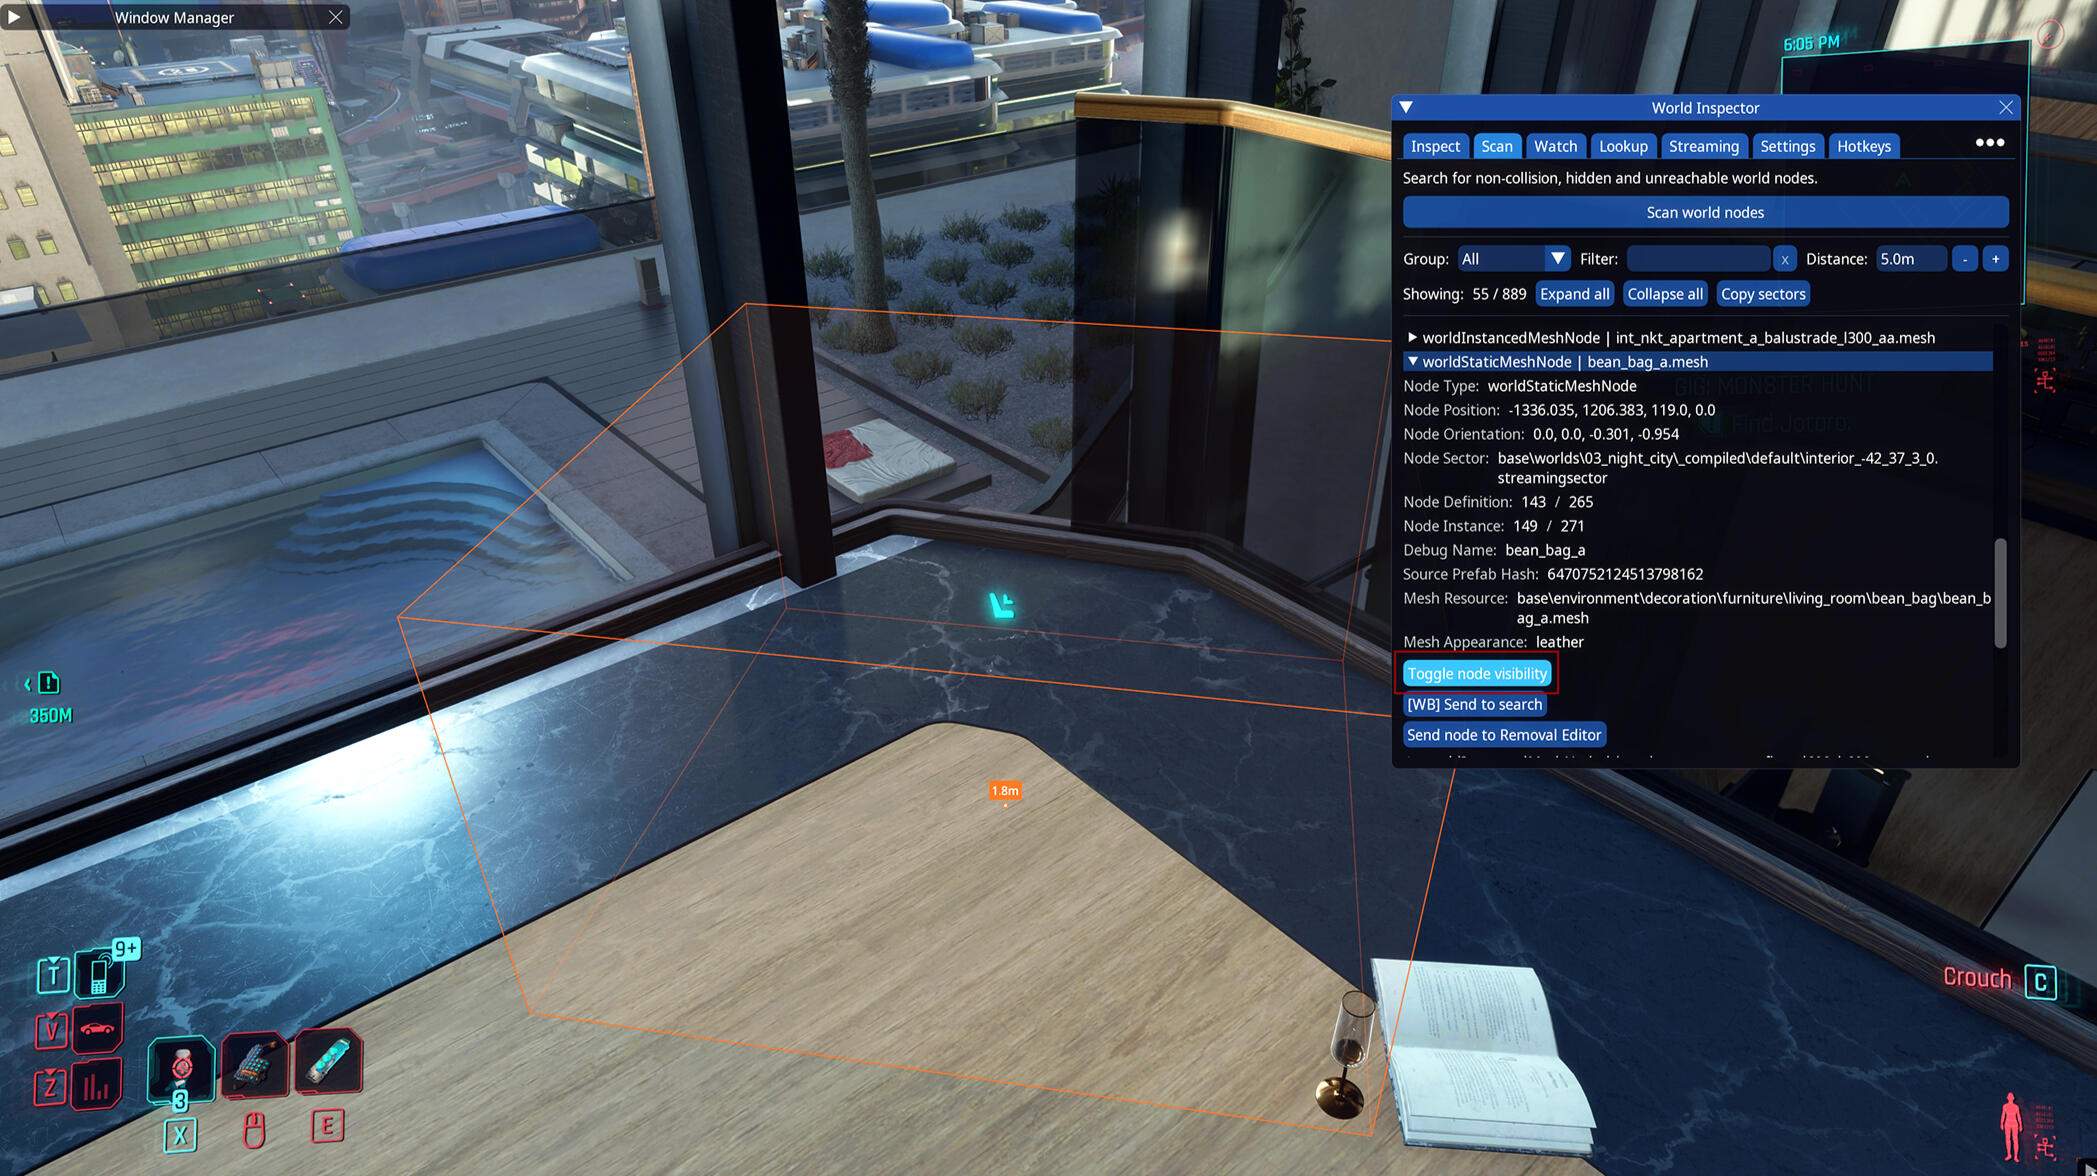
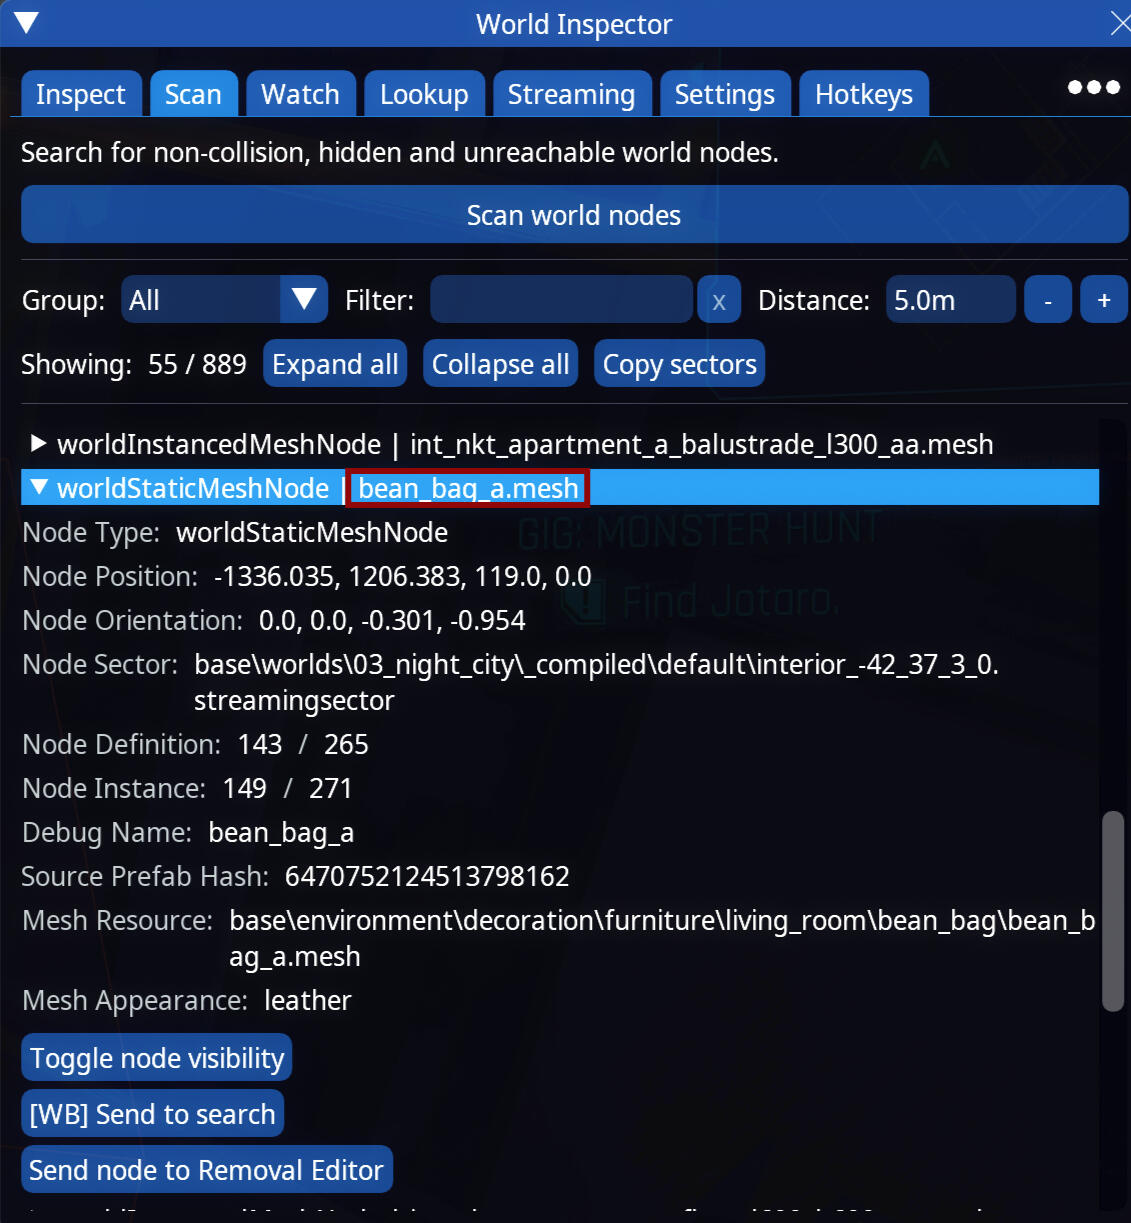
Okay back to serious stuff. So what we need is the mesh name. It's already in the main line without opening it up. bean_bag_a.mesh is technically all I need. This is easy to remember but you see above it that there is a long named mesh. Just write the name down so you can be sure you get the right thing in Wolvenkit.When you have the name noted down close the game! We're done here.
Wolvenkit
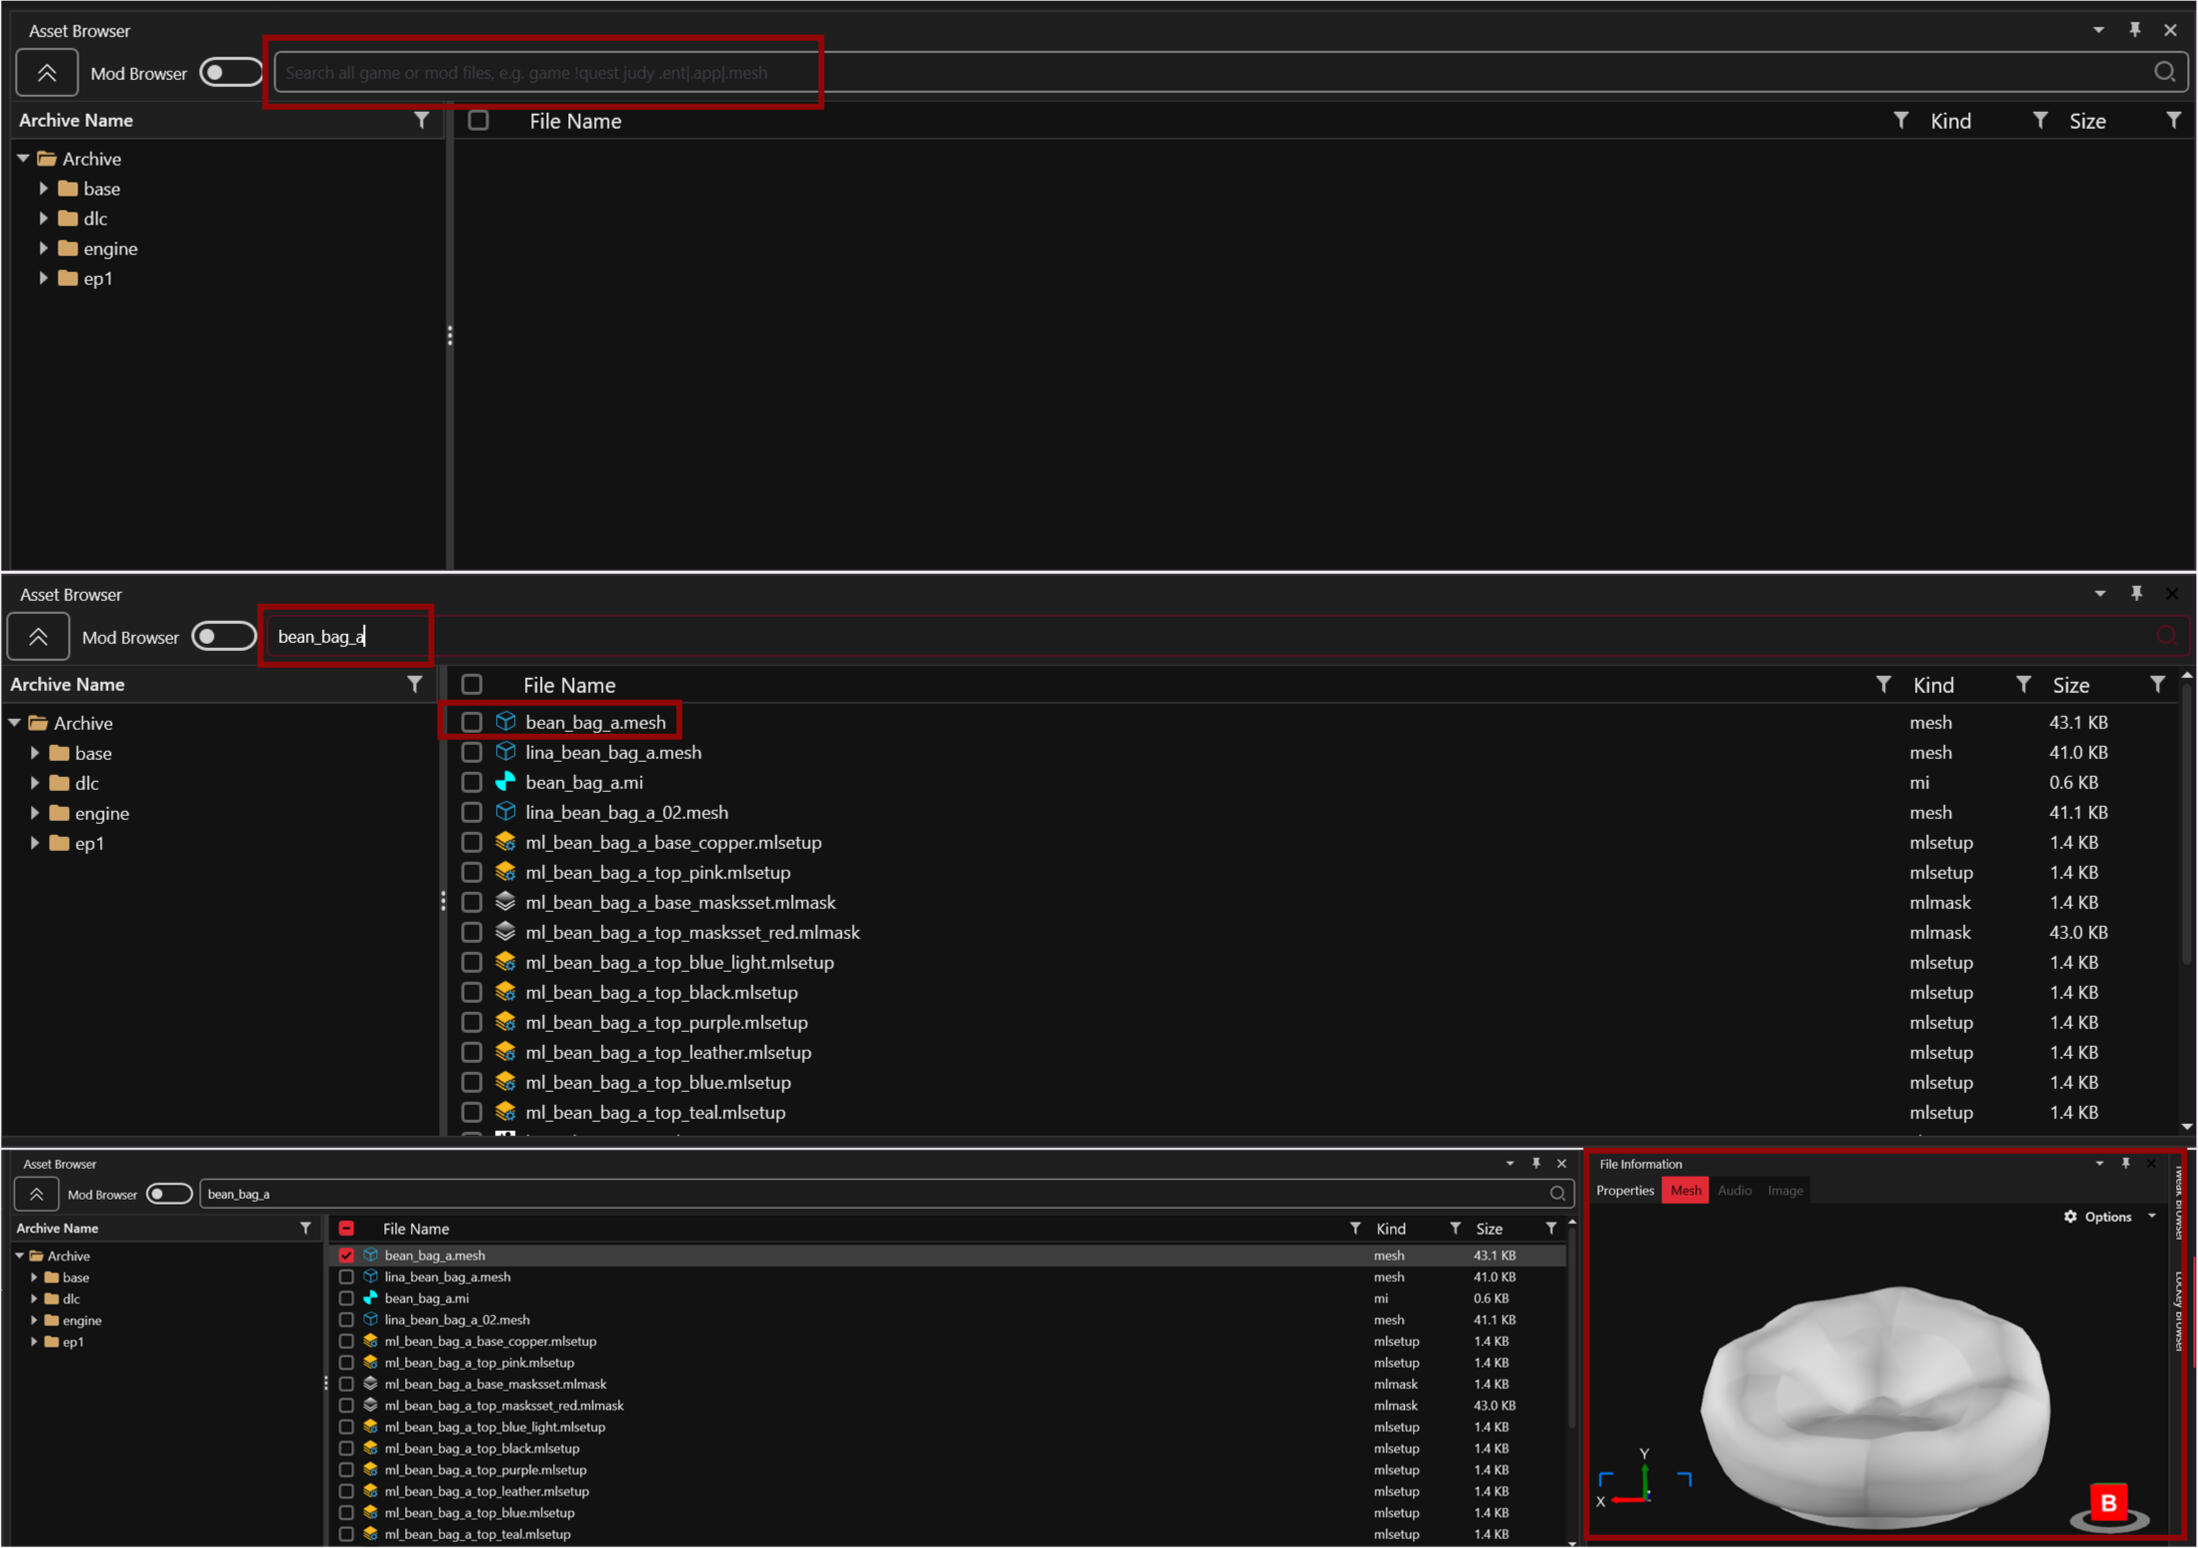
Open Wolvenkit. You can open your pose project if you want or make a new project for this item or an in general item pulling project that you can easily reuse in the future.When you're in your project locate the Asset Browser (its in the top middle for me, if you changed things around it maybe elsewhere). Type in the mesh name you just wrote down. A bunch of things will appear but find the one that matches the name exactly.If you have the File Information window you can click the mesh and see it in that window so you can be sure it's what you are looking for!
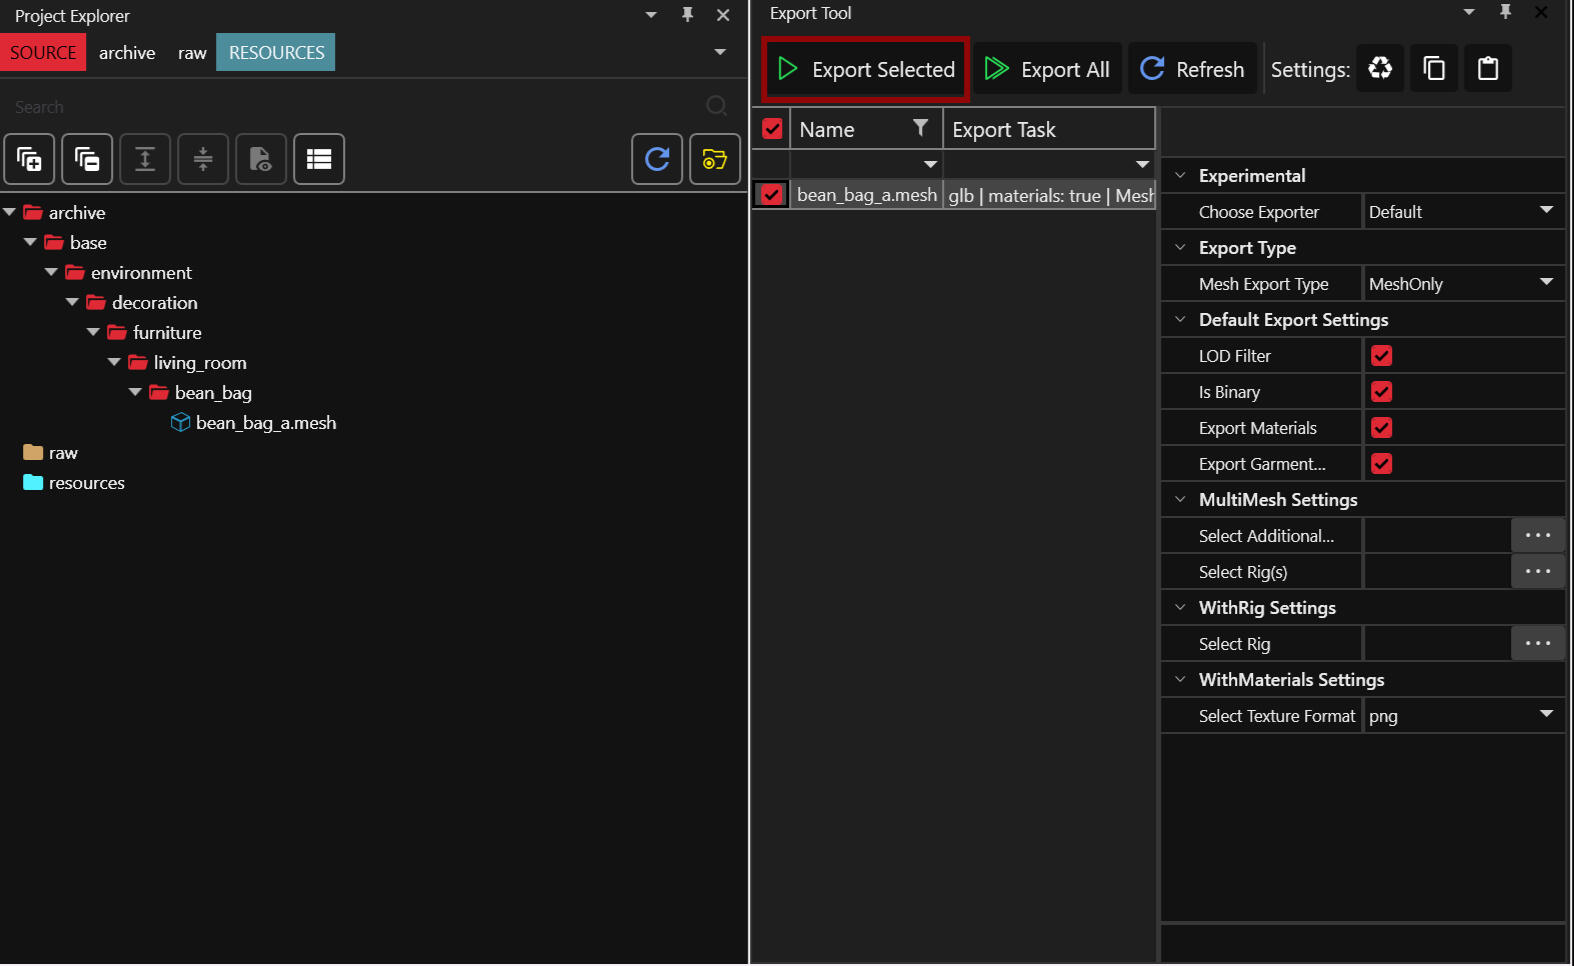
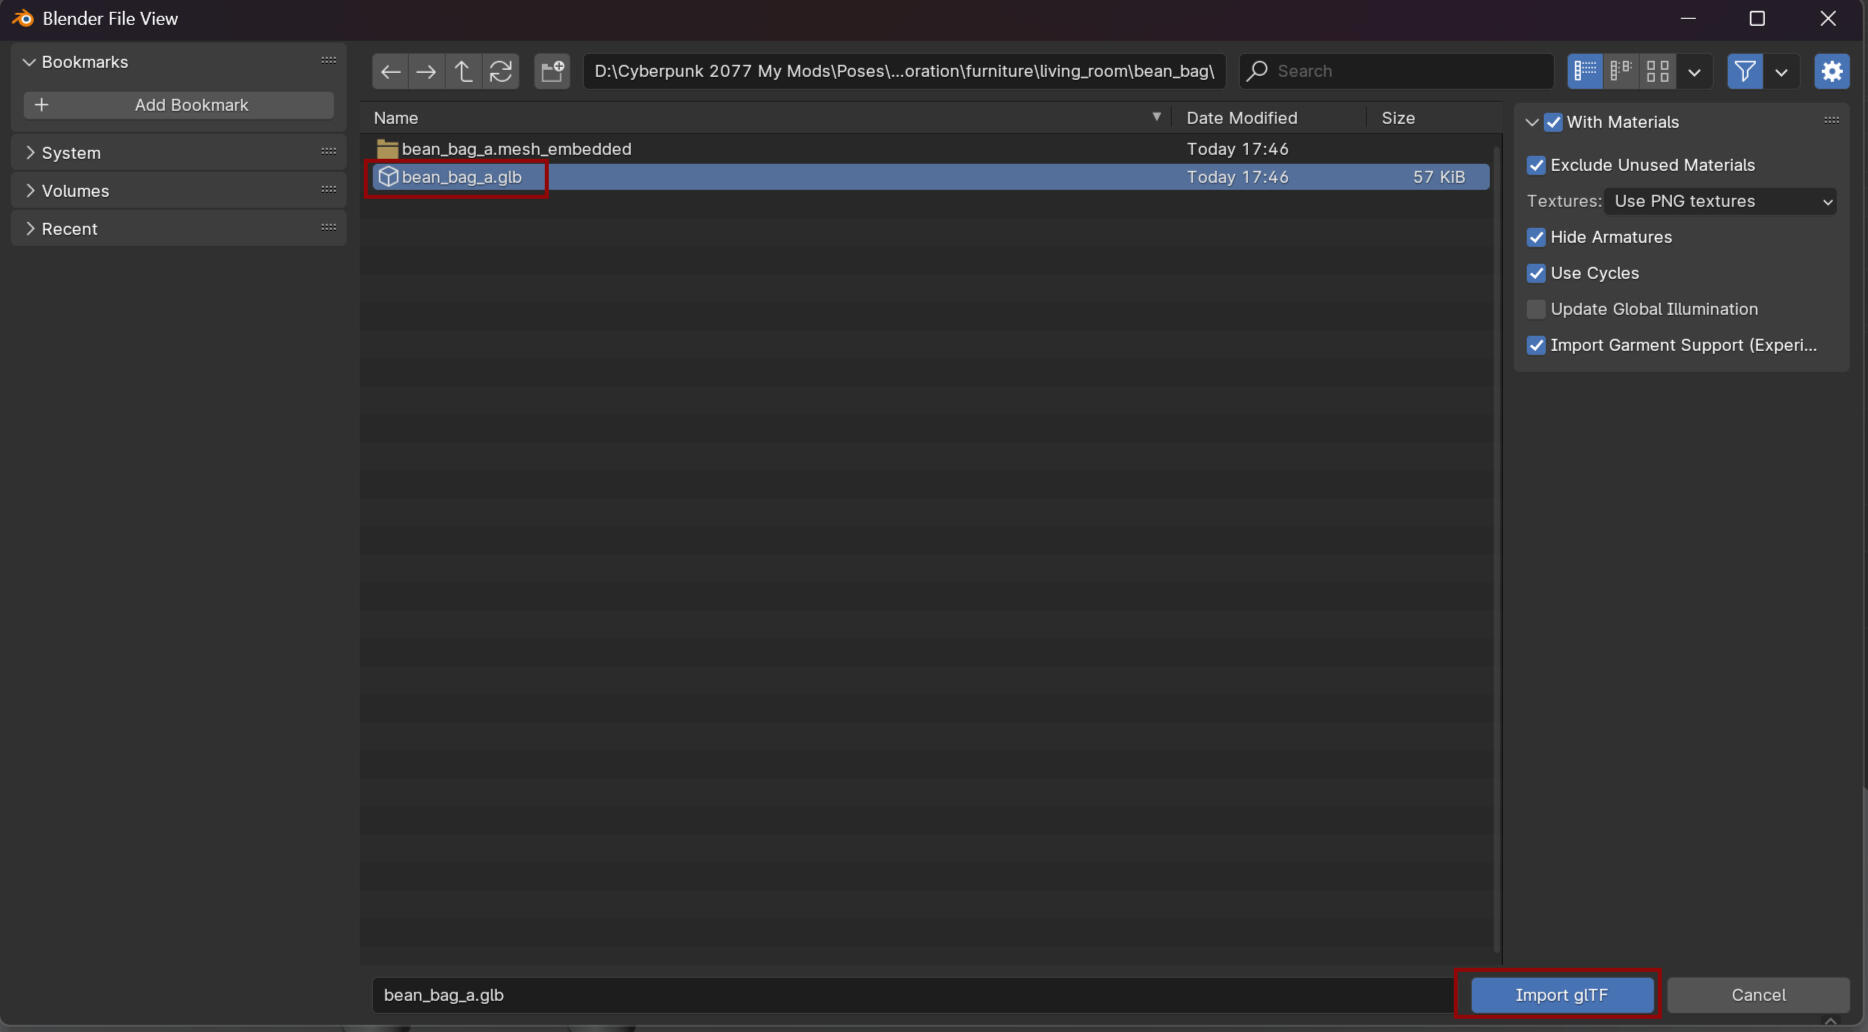
Double click the mesh so it gets added to your project. Locate your export tool and export the mesh. You can use the settings you see below but honestly the last clicked thing is garment support which is for clothes and I never changed it back so you could technically skip that one.Anyway we are done with Wolvenkit. Time to move on to Blender!
Blender
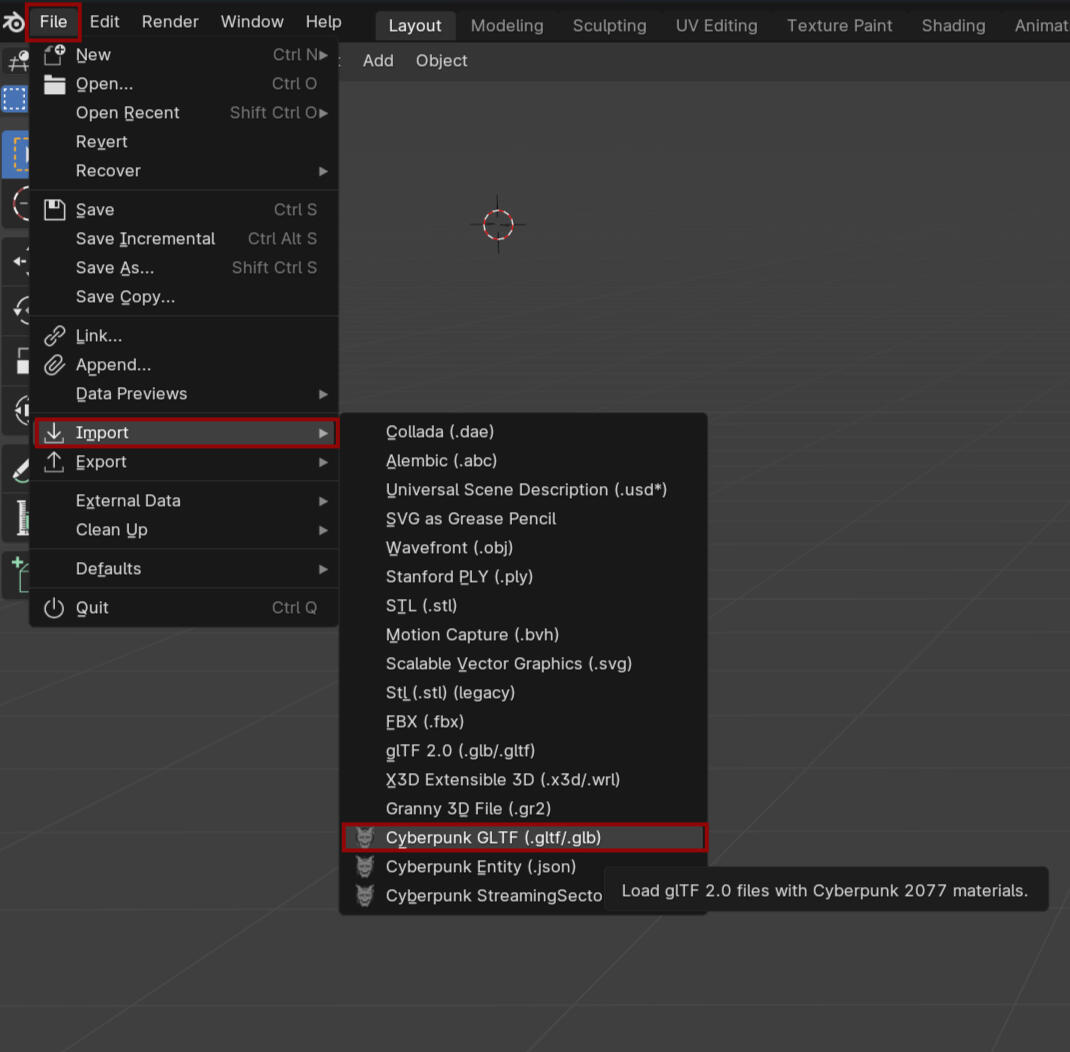
Open up whichever model you want to use with the item.Make sure the mode is set to Object Mode then go to File - Import - Cyberpunk GLTF. It should open a new window.
Find your project and go through all the folders until you find the mesh. It will start much the same as when you have to find your anims file to save the poses. Source - Raw and then whatever folders are there.Once you find it press Import.
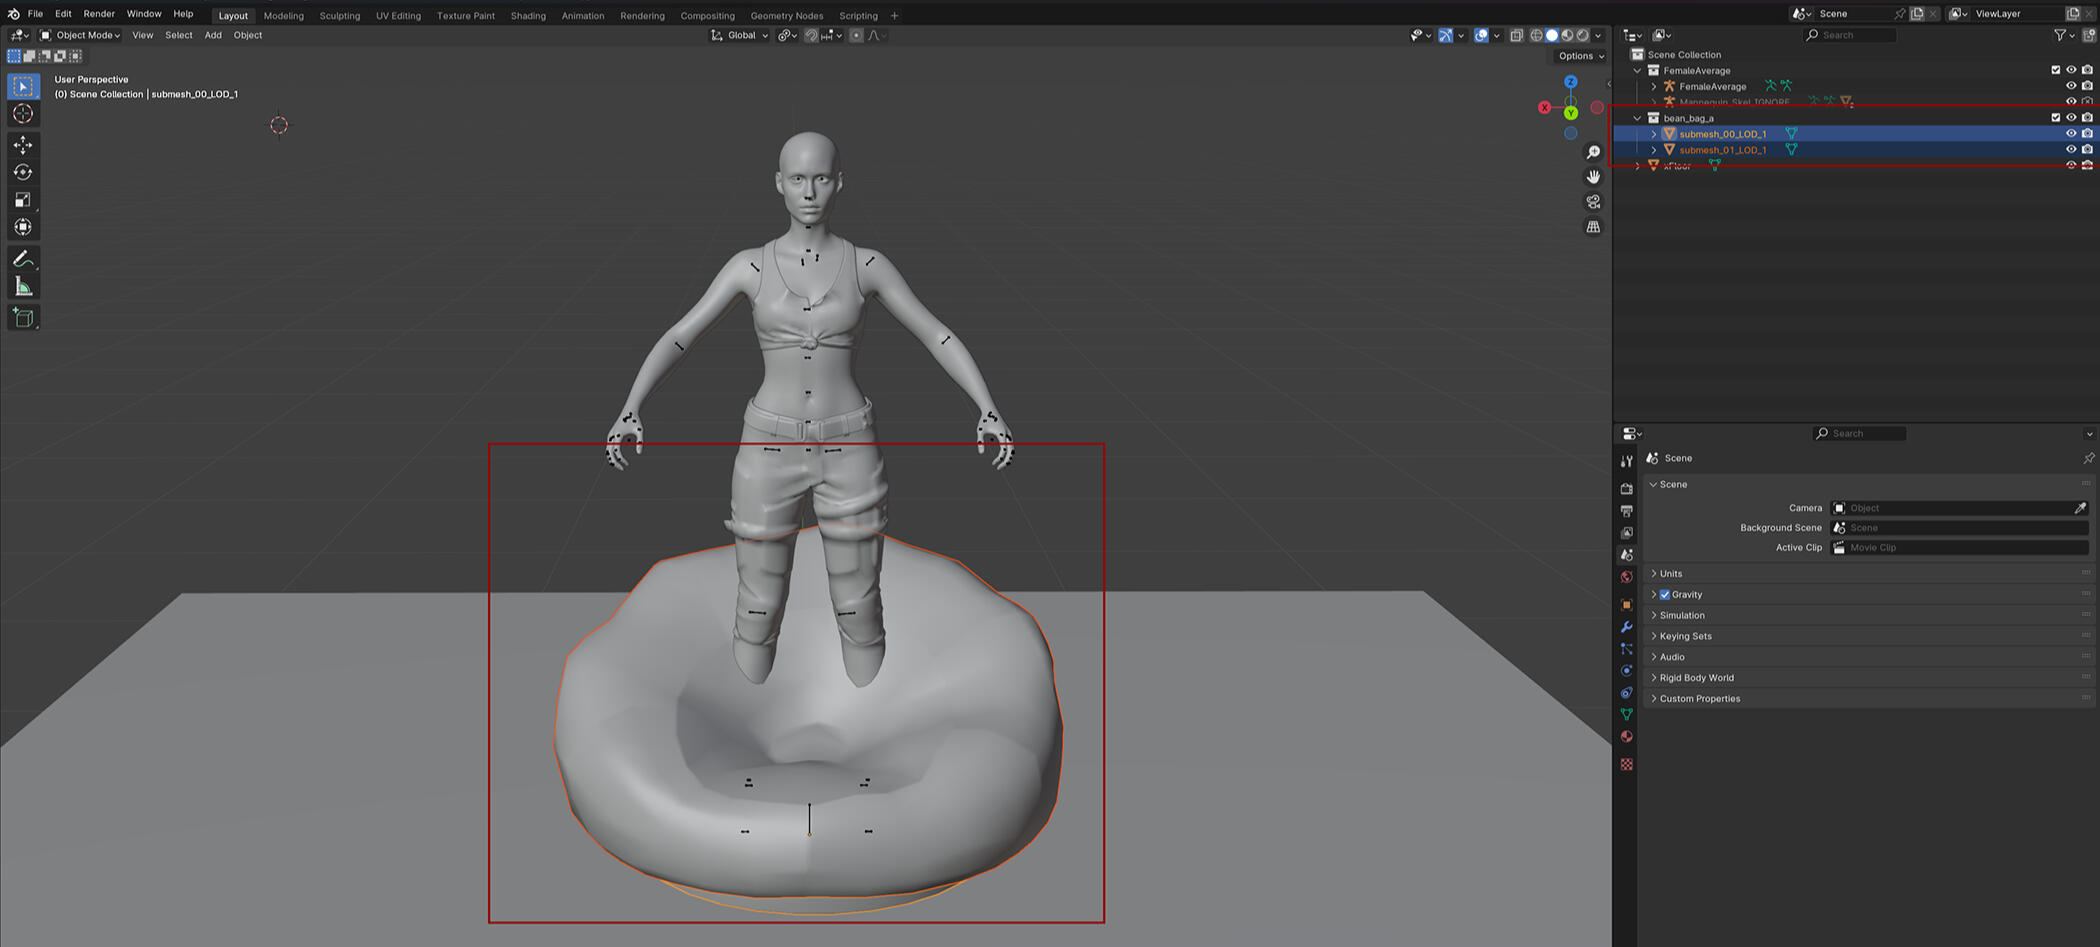
Now your item should be in Blender! There will be a new collection in the Scene Collection for it.If you are using the IK bones model you may notice that the bones have become smaller. The way to prevent this is to not import it directly into the model file but instead import it into an empty blender file then copy and pasting it from there into the model file. Everything else will still work the same and the IK bones won't be small and annoying to work with.You can move the item around in Object mode but not in Pose Mode so keep that in mind. Also another thing to note you see this bean bag has two submeshes, so it consists of two different parts. If I want to move it I need to select both submeshes or the item basically breaks. Which is fine in Blender since it won't show in game but can be annoying with some items. So watch those submeshes!
Make your pose(s) and export them as normal. Do not worry about the item further, it won't be in the pose in photomode. Just remember to make sure your model is centered on the root bone/middle of the ground point before you export! When working with items you may sometimes have to move your model to fit while you're posing so it can be easy to loose sight of.And that's it. That is how you get your item name to find it in Wolvenkit and how to then get it in Blender. Hope the guide was helpful! Happy posing!